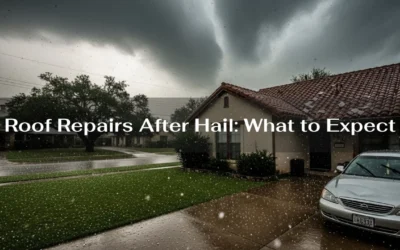

South Texas heat, sudden downpours, and spring hail are tough on Roof Vents and Pipe Boots. If you’re noticing water stains near a vent pipe, a musty attic, or shingles curling around a vent, the problem often traces back to vent pipe flashing, a plumbing vent boot, or an aging roof jack.
This guide shows you how to spot problems fast, decide on roof vent repair or pipe boot repair, and understand what a professional will do to stop the leak the right way. If you’re already seeing active drips during a storm, skip to the quick triage checklist below—or contact a pro for emergency roof vent repair right away.
If you’re Googling terms like vent pipe leaking roof, cracked pipe boot, damaged roof jack, or wind-driven rain leak at vent, you’re in the right place.
What are Roof Vents and Pipe Boots?
Roof Vents and Pipe Boots are the components that let air move or plumbing lines vent through your roofing system while keeping water out. “Vents” include plumbing vent stacks, turtle vents / box vents, ridge vents, static roof vents, and even HVAC roof vents or power attic vents. The “pipe boot” (sometimes called a roof jack cover or lead boot flashing) is the flashing-and-gasket assembly that seals around a round pipe as it exits your roof.
A solid seal depends on:
- Correct pipe boot size (see “pipe boot size chart” on product packaging)
- Compatible material (neoprene pipe boot, EPDM pipe boot, or lead pipe flashing)
- Proper integration with underlayment around vents and flashing around shingles
- Weather-rated sealants (silicone roof sealant) where appropriate
- Code-compliant detailing (code requirements for vent flashing)

Signs your vent or boot is failing
Early detection saves drywall, insulation, and your framing. Watch for:
- Water stains around vent pipe on the ceiling below the penetration
- Dark streaks on shingles near the vent or granule loss from water flow
- Leaking pipe boot during storms or after hail events
- Deteriorated rubber boot (cracked, brittle, or shrinking) around the pipe
- Loose or missing roof vent cap, rain collar for vent pipe, or lifted shingles
- Damaged roof jack or misaligned aluminum flashing
- Moldy attic sheathing near the stack (persistent leaks promote mold)
- Sagging decking near the vent if leakage has been long-term
TL;DR: If you can push a finger into a split gasket, or see daylight around the pipe in your attic, you likely need pipe boot flashing replacement or to replace vent pipe flashing.
Why leaks happen at Roof Vents and Pipe Boots
There are a handful of usual suspects in San Antonio:
- UV and Heat Aging: Our sun bakes elastomer gaskets. Neoprene or EPDM boots stiffen and crack, leading to a roof vent leak that shows up during the first heavy rain.
- Hail & Wind: Hail damage roof vent dents metal caps and splits gaskets; wind can lift shingles and break the bond around the flashing—classic storm damage roof vent repair territory.
- Improper Installation: Missing step flashing vs counter flashing where needed, shallow shingle overlaps, or nails through the flashing can funnel water inside the system.
- Wrong Materials: Using generic caulk instead of a compatible silicone roof sealant, or a boot not rated for high-heat stacks (e.g., near some HVAC discharges) shortens lifespan.
- Aging & Maintenance Gaps: After 10–15 years, even good systems need evaluation. How long do roof vent boots last? In our climate, 8–15 years is common depending on product and exposure.
Quick triage if water is actively entering
Before the next storm cell hits:
- Contain and protect: Place a bucket/towel under the drip; move belongings.
- Check the attic: Carefully look for the source around the plumbing vent stack.
- Temporary mitigation: If safe and dry, a pro may apply a short-term roof vent caulking/sealant or install a rain collar. (Avoid excessive caulk blobs; they often trap water.)
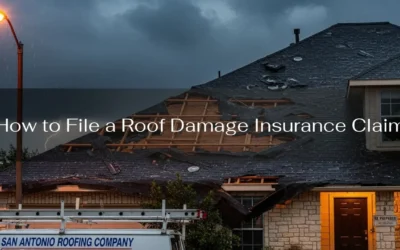
- Document for insurance: Take photos—especially after hail or wind—for adjusters.
- Call help: For emergency get a roofer who does same-day tarping and next-day pipe boot repair.
Can you caulk a leaking vent pipe? For a day or two, maybe—but caulk is not a structural fix. Proper roof penetration waterproofing relies on flashing geometry, not just good.
DIY vs. professional: when to call a pro
A confident DIYer might handle a simple rubber pipe boot replacement on a one-story shingle roof with a low pitch when winds are calm and decking is dry. However, call a pro if:
- The roof is steep, high, or wet (fall risk)
- You see rotten decking, soft spots, or sagging areas
- There’s hail impact, wind-creased shingles, or damage beyond the boot
- You have a metal, tile, or low-slope system that needs specialized parts
- You’re unsure about underlayment integration or shingle weaving
Beyond safety, a qualified roofer will evaluate adjacent penetrations, attic ventilation, and soffit vent maintenance to make sure you don’t fix one leak and miss the next.

How pros repair Roof Vents and Pipe Boots (step-by-step)
Here’s what a thorough vent pipe flashing repair looks like on an asphalt shingle roof:
- Assessment & Leak Trace: Inspect the interior and exterior; lift shingles gently to find nail holes or pathways. (Many “boot leaks” are actually errant nails or underlayment laps upslope.)
- Remove the Affected Boot/Flashing: Extract nails, break sealant bonds, and slide out the old lead boot flashing or aluminum flashing assembly. Check decking condition.
- Repair Decking if Needed: Replace any compromised sheathing, re-fasten, and ice-and-water or synthetic underlayment around vents.
- Install the Correct Boot: Match pipe boot size to the stack. Choose neoprene, EPDM, or lead pipe flashing based on temperature exposure, UV, and local code. For metal roofs, use boot systems designed for ribbed panels.
- Integrate With Shingles: Slide the new flashing under the upslope course; fasten at manufacturer locations; weave shingles to shed water properly.
- Seal Strategically: Use manufacturer-approved silicone roof sealant sparingly—primarily at nail heads and specified seams. Install a rain collar for vent pipe if needed.
- Reinstate Ridge/Box Vents as Needed: For turtle vents / box vents, ridge vent repair, or power attic vent repair, replace damaged units and flash to spec.
- Water Test & Cleanup: Hose test in controlled conditions if appropriate, then clean up granules, nails, and packaging.
Cost: what to expect in San Antonio
Cost to replace roof vent boot ranges with roof height, pitch, material, and damage scope. Typical ballparks for shingle roofs:
- Single pipe boot flashing replacement (straightforward): $175–$375
- Multiple boots or upsized replace roof vent boot with decking repair: $350–$750+
- Extensive hail/wind repairs with vent cap replacements: varies, often part of an insurance claim
Will insurance cover pipe boot leaks? If damage links to a covered peril (hail, wind), many policies help. Wear-and-tear or old caulk failure is usually not covered. Ask your roofer for photos and a line-item estimate to submit with a claim.
San Antonio specifics: heat, hail, and code
- Heat & UV: Consider upgraded EPDM pipe boot or lead boot flashing for longevity in hot, sunny exposures.
- Hail: If you suspect a storm, schedule a full roof check; roof jack leak repair after hail storm often accompanies shingle bruising or vent cap dents.
- Codes & best practices: Follow code requirements for vent flashing and manufacturer instructions—especially for high-temperature stacks and metal systems.
DIY corner: how to repair a roof vent boot (overview)
If you’re evaluating whether this is DIY-friendly, here’s the high-level sequence (for information only):
- Choose a compatible rubber vs lead pipe boots option that fits your stack.
- Lift the shingle tabs with a flat bar and remove fasteners.
- Slide out the old boot; inspect for rot.
- Slide in the new boot, ensuring the upslope flange tucks under the shingle course.
- Nail per spec and apply roof vent caulking/sealant on nail heads.
- Re-seal shingle tabs with roofing cement (sparingly).
If you find hidden damage, stop and call a pro. Remember, a small mistake at a penetration can send water under multiple courses of shingles.

Our service: fast, local vent and boot repairs done right
Home in Alamo Heights, Stone Oak, Helotes, Leon Valley, or anywhere in the metro? Our licensed, insured team handles roof vent repair San Antonio, pipe boot replacement San Antonio, and full storm damage roof vent repair after hail and wind. We inspect your entire system, not just the obvious leak, so you’re protected the next time the radar lights up.
Need help now? Book a free 12-point inspection and learn whether you need a simple repair or replacement. Get started here: trusted RRSATX: San Antonio Roofing Company.
FAQs
What causes vent pipe leaks?
Aging gaskets, improper flashing geometry, hail dents at the cap, nails through flashing, or wind-lifted shingles. Sometimes the leak originates upslope and travels to the penetration.
Do pipe boots need replacing?
Yes. Elastomer boots age in our climate. Expect inspection at 8–10 years; replacement by 10–15 years is common depending on product and exposure.
How long do roof vent boots last?
Quality neoprene or EPDM boots can last a decade or more; lead boot flashing may last longer. UV, temperature swings, and installation quality make the difference.
Best sealant for roof vents?
Use manufacturer-approved silicone roof sealant or the specified product for your flashing. Sealant is a helper—not the primary waterproofing method.
Repair vs replace pipe boot—how do I decide?
If the gasket is cracked or shrunken, replace. If flashing is bent, rusted, or incorrectly woven with shingles, replace the assembly. Small nail holes or minor laps can sometimes be re-worked.
Who fixes leaking vent pipes?
Roofers who specialize in vent pipe flashing and roof jack repair. For interior plumbing vents, a plumber may be involved—but the roof penetration is a roofing task.
Can a damaged boot cause attic mold?
Yes. A slow leak saturates insulation and sheathing, raising humidity. Address the leak and ventilate/dry the attic promptly.
How much is the cost to replace roof vent boot in San Antonio?
Many straightforward replacements fall in the $175–$375 range; multi-boot jobs or decking repairs cost more. Hail/wind damage may be insurance-eligible.
How to replace vent pipe flashing on a shingle roof?
Turn off any attic fans/heaters near the area, work on a dry day, and follow the steps in our DIY overview. If anything looks questionable—call a pro.
Are indoor plumbing (indoor) vent repair, automotive vent boots, or HVAC duct boots (indoor) the same thing?
No. Those are different products/environments. Roof penetrations require exterior-rated flashing systems designed for weather and UV.
Final checklist to prevent the next leak
- Inspect all penetrations each spring and fall
- Replace brittle gaskets before monsoon season
- After hail, get a whole-roof assessment (vents, caps, and shingles)
- Keep a photo record for warranty and insurance
- Use code-compliant materials sized correctly and integrated with underlayment
When you’re ready
Whether you need a replace roof vent boot, reseal roof vent, full pipe boot flashing replacement, or broader storm repair, we’re here to help—quickly and transparently. Book your free 12-point inspection and protect your home before the next storm rolls over I-10.